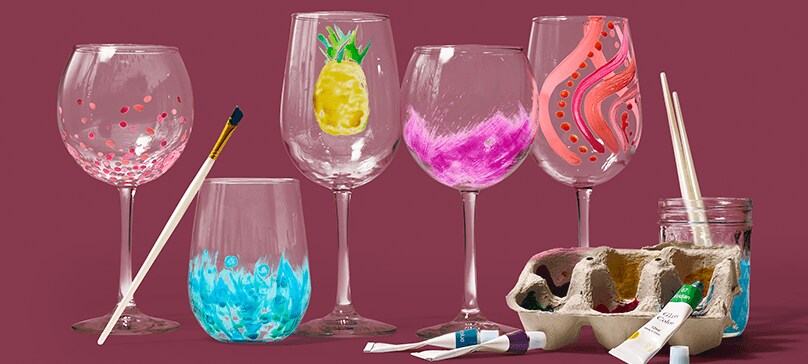
How to Paint a Wine Glass
Sip, sip, hooray! Whether you’re wanting a fun party favor or a unique gift for any occasion, celebrate by creating a one-of-a-kind hand-painted wine glass. Don’t worry, you don’t have to have Rembrandt-level painting skills; painting on glass is easy and fun. Let’s get started!
What you’ll need
- Wine glass – We've got very affordable glasses, both stemmed and stemless, available in-store or for pickup, delivery or ship.
- Rubbing alcohol or white vinegar – To remove any trace of dirt or grease from the glass.
- Paints – Make sure you’re using paint made specifically for glass. Depending on the design you have in mind, you may want to buy several colors.
- Paint brushes – You might want to experiment with an assortment of sizes, from very fine to thicker.
- A palette – Use a paper plate, small paper or plastic cups, or an egg carton (upcycle!) to keep your colors separated.
- Cotton swabs – You can use these instead of, or in addition to, paint brushes. They work great for dabbing polka dots or small details. Just be sure to keep the swab perpendicular to the surface—dabbing in a straight up-and-down motion will help to avoid smears.
Start painting
Before you start, make sure your glass is completely clean. Wash well in soapy water, dry with a towel, and then let air dry. Once thoroughly dry, rub some alcohol or white vinegar on the surface of the glass and let that dry. This is an important step, as it will help the paint to adhere to the glass.
Before you start, you may want to make a sketch of your design for practice. You can place your paper sketch on the inside of the glass, facing out, and use it as a pattern. You can also use ready-made stencils or even download and print them from online. If you’d rather just freehand it, that works too.
You can even paint the stem and base for extra flair.
Pro tip: Not sure where to begin design-wise? Here are some simple starter ideas:
- Polka dots
- Hearts
- Stripes and squiggles
- The recipient’s name or monogram
- Simple stylized flowers (petals could be made out of fingerprints or polka dots)
- Random swirls or brushstrokes
Your art can be as simple or elaborate as you’d like. Brushes of different sizes and shapes can vary the look; use a very fine brush for details.
Place a little of each color you plan to use on your palette or in separate containers. Use paint brushes, cotton swabs or even sponges to make your design. Start with darker colors. Don’t rush—you’ll want to keep as steady a hand as possible. You may want to place some crumpled white tissue, a white cloth or paper towel, or a white sock inside the glass—this can help you see what you’re doing as you work your way around the outside of the glass.
Important: Keep your design far enough from the rim of the glass so that the drinker’s lips won’t touch the paint, as it could prove toxic.
Once you're satisfied with your design, you'll need to ensure the paint dries and cures completely so your design stays in place. To do so, you can either:
- Place a foil-lined baking sheet in the oven. Put the glass or glasses on the baking sheet, close the oven and set it at 350°F (Do NOT preheat). Bake for 20 minutes, then turn off the oven and let the glasses cool down for 10 minutes more. (Check the instructions on your paints to make sure this is the recommended method.)*
- OR Let the glass air-dry and cure—this method takes about three weeks, so plan accordingly.
*Some brands of glass paints recommend a four-day curing period before finishing the curing in the oven. Read the instructions on your paints.
The paint should now be top-rack dishwasher safe and the glass ready for sipping!
Pro tip: You can also use markers specially designed for glass painting. This may be an easy way to draw an outline for your design. Follow the instructions on the package for proper drying.
When you’re ready to gift your hand-painted creation:
- Place it in a decorative box filled with colored tissue shreds
- Fill a basket with tissue and add the glass or glasses
- Tie a ribbon around a stemmed wine glass
- Tuck a note into the glass, or tie a gift tag to the stem
- Make it even more fun with suggested wine tastings and pairings! Fill your box or basket with everything needed for a wine-and-cheese celebration. Check these links for ideas on food and wine pairings available at Kroger:
Glass painting is a fun craft for any age and would be a great gift for all occasions. Consider who you’re creating this gift for and personalize the design to their interests. Don’t forget, you can fill your cup with more than just wine. Enjoy juice, sparkling water, or a mocktail. In this case, it’s not really about what’s in the glass, but what’s on it that counts.

